Revenue Manager is Vantaca's management and admin billing feature. It provides a dedicated experience for managing charges, vendors, management billing, and admin billing. This article describes how to set up and enroll in Revenue Manager so you can use it for billing, contracts, and accounting.
Contents
Revenue Manager Enablement
Contact your Vantaca Customer Success Manager to register for the Revenue Manager rollout before proceeding with the steps below.
Add the Role Security
You can add the ability to use Revenue Manager to different roles.
For each role that you want to be able to use Revenue Manger:
-
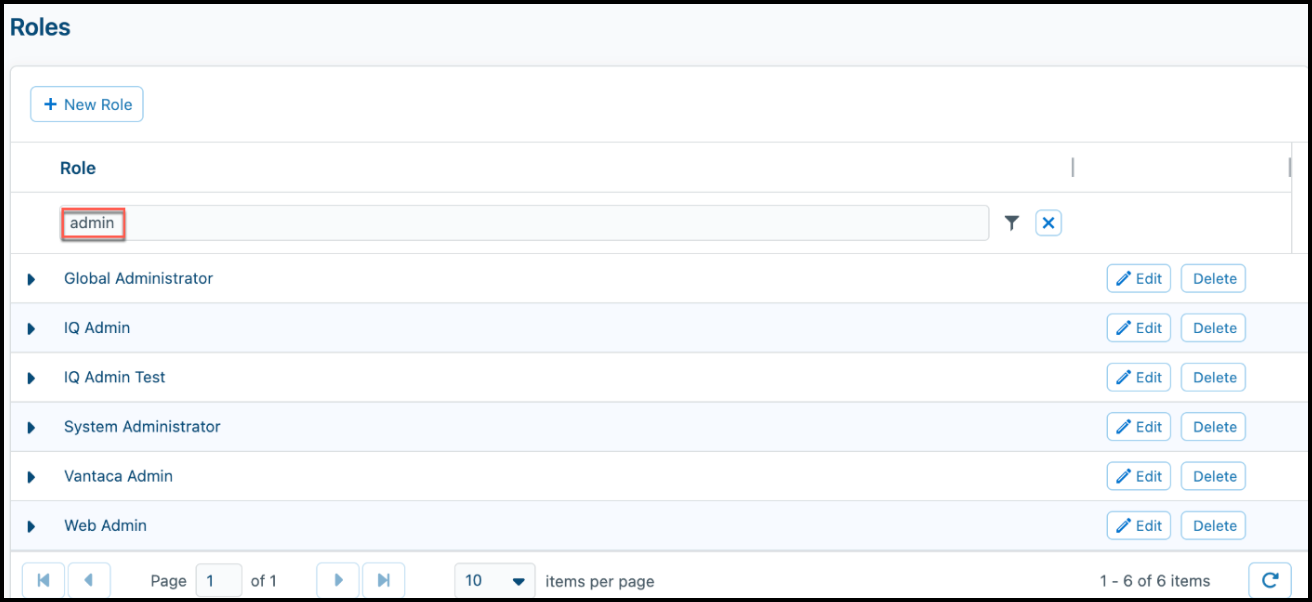
Navigate to Settings > Roles. The Roles page displays.
-
Search for the role that you want to allow to use Revenue Manager.
For example, in the following image, the user wants to allow Administrators to use this feature and enters admin in the search field to display all roles that include the word "admin".
-
Click the caret next to the role name to open it (ensure the Security tab is selected).
-
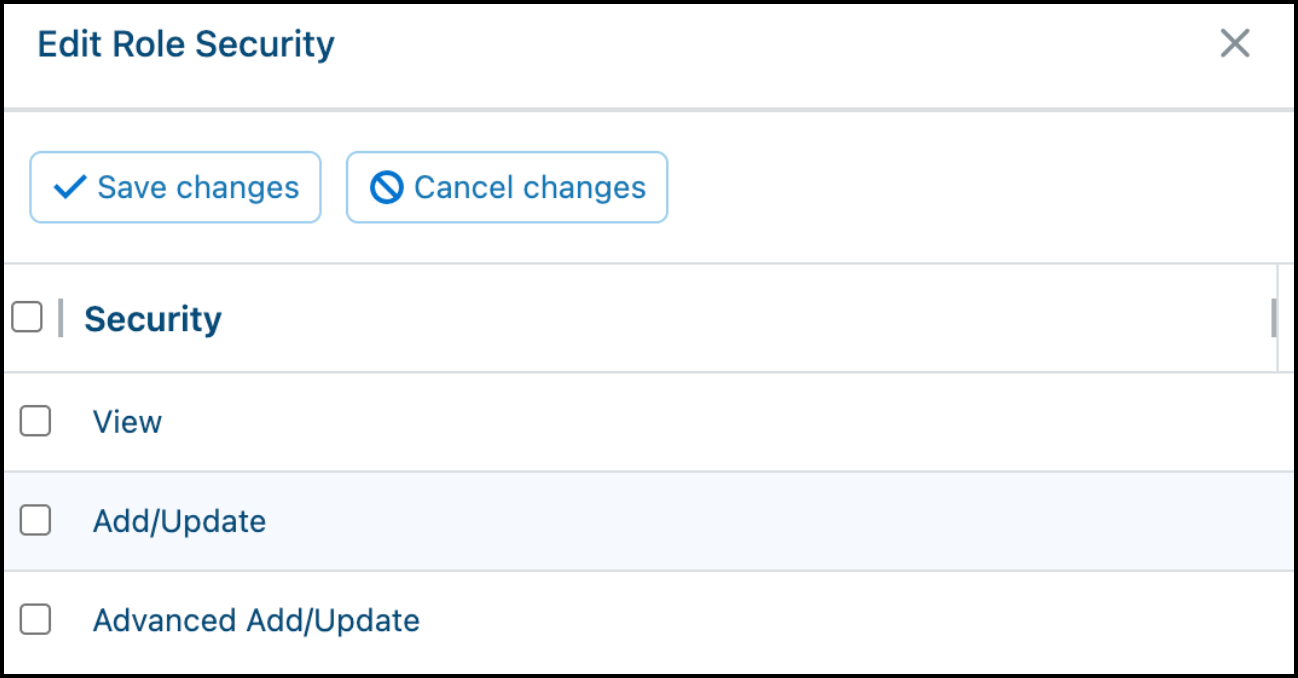
Go to the Management section and click Edit next to Revenue Manager.
The Edit Role Security screen opens.
-
Select View to give users access to all functionality in Revenue Manager.
-
Click Save changes.
Before You Start
If you already work with Management Center, Vantaca Support will migrate your data for you.
Make sure that the following items are correct and ready for migration:
- Your corporate chart of accounts, including GL codes.
- A list of items that you would like to charge to the associations (these display as charges in the Revenue Manager Configuration tab).
-
For each item charged to the associations, make sure you set up the following on each charge:
- Association Billable Charge
-
Association Expense GL
Note: Vantaca recommends that you use the same Association Billable Charge and Association Expense GL for each item you would like to charge to the association to maintain consistency across GLs.
Tip: Asses your existing contracts and decide how you want to set them up in Vantaca. Learn more about fees by reviewing the "Revenue Manager: Contracts" article. When you create your Charges list, you will need to add a Corporate GL and Fund to each one. The following articles may provide guidance:
Vantaca Set Up
Make sure to complete the following tasks in Vantaca before you begin using Revenue Manager:
-
Add any GL accounts you need for your corporate accounting income GL to the association. See the "Global GL Accounts" and "Editing GL Accounts for Associations" articles.
-
Add all billable charges to the associations to which you want to bill admin fees. See the "How to Set Up a New Charge or Assessment" article.
Everything else you need to get started will be set up during the enrollment process within Revenue Manager.
Get Started
To get started with Revenue Manager:
-
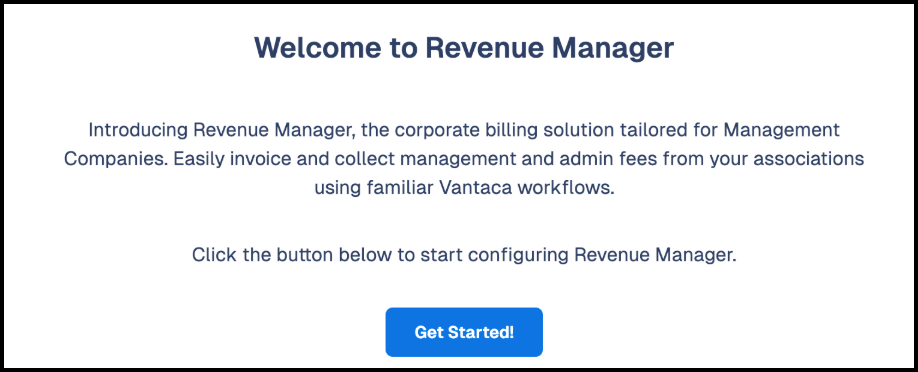
Navigate to Management > Revenue Manager.
The Welcome to Revenue Manager screen displays.
-
Click Get Started.
Revenue Manager checks to see if you have a management company association set up.
If Yes, it will use that management association to pull in all of the associated data, such as
homeowners, accounts, vendors, etc. If you do not have one created, Revenue Manager creates
one for you based on your company information. See the following Management Company
Association section for more information about the role of this association.
-
View the Configuration section.
Your data displays in the Configuration section. If this is a new management company association
(you have not used Management Center before) you can add vendors, funds, charges, and
update company info in this section. See the following sections about how to do so.
Management Company Association
The management company association (default code: MGMT-COMP) represents the management company. All of the associations that the management company manages are represented as homeowners within this association.
The management company association uses an Association GL, but does not use activity on this association's Homeowner GL to create charges (because it is the management company). The activity on the Homeowner GL of non-management company associations (homeowners) is used to generate charges.
Corporate GL Setup
Make sure that you set up your corporate chart of accounts in Vantaca before you use Revenue Manager to identify which corporate GL accounts to use for each fee type. If you have already created Global GLs with the same GL codes as your corporate accounts, edit the GL information at the association level.
Note: Do not change the Global GL descriptions unless you want these changes applied everywhere the GL is used. If you need to edit this information, do so within the Association GL for the new management company association. The corporate GL structure must be represented within the management company association in Vantaca.
Back to Top
Configuration
The Revenue Manager Configuration section includes the following areas:
Vendors Page
If you have no vendors set up, the Vendors page will be blank. Start by adding the one that represents your management company. This will be an existing vendor as it was created during the enrollment process. Go to the Add an Existing Vendor section.
After you have a vendor in Revenue Manager, the Vendors page includes the following options:
-
New Vendor and Add Existing Vendor: Click to add a new or existing vendor. Use the following procedures for instructions.
-
Export: Click to export the entire table to an Excel file. The export will contain details about the items displayed within the table according to the applied filters and columns. If you do not apply any filters, it exports all vendors.
-
Edit: Opens the Edit Vendor window where you can change the vendor information.
-
Delete: Removes the vendor.
-
Merge: Click to open the Merge Vendor screen where you can select another vendor to merge this one into. Merging adds the information of this vendor to the selected one. The main information (address, email, etc.) remains that of the vendor that you selected to merge into. For more information, see the "Merging Duplicate Vendors" article.
Add an Existing Vendor
To add an existing vendor:
- Navigate to Management > Revenue Manager.
-
Click the Configuration tab, and then Vendors.
-
Click Add Existing Vendor.
The Choose Vendor screen opens.
-
Select the vendor that represents your management company (default code MGMT-COMP) from the list.
-
Click Use Selected Vendor.
Note: If you try to add an existing vendor that is missing information, the Edit Vendor screen opens, allowing you to add the missing information before saving.
- Complete this procedure again if you wish to add additional vendors.
Add a New Vendor
To add a new vendor:
- Navigate to Management > Revenue Manager.
-
Click the Configuration tab, and then Vendors.
-
Click New Vendor.
The Add Vendor screen opens.
-
Fill in the fields with the information relevant to the new vendor.
Notes:
-
If you enter a Doing Business As (DBA) name, it appears on checks; otherwise,
Vantaca uses the Vendor Name.
- Vendor contacts use primary contact information (this applies to imported vendors as well). If the vendor has no primary contact information, no values display on the Edit screen or in the grid. If you add contact details in the Edit screen, the system automatically creates a new primary contact.
- Click Add Vendor.
Back to Top
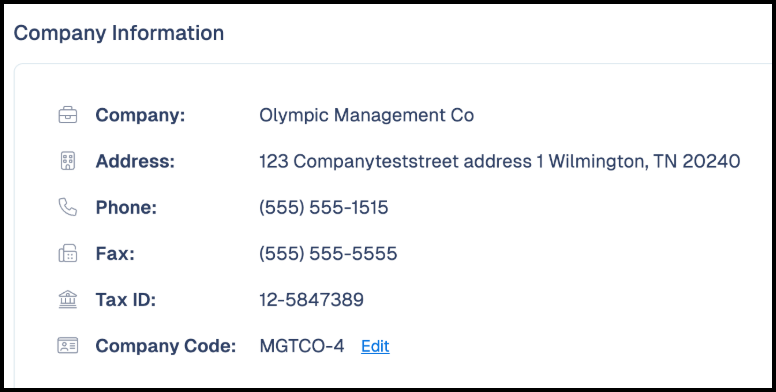
Company Information Page
This page draws from your management company information in Vantaca. You can only set up one management company in Revenue Manager.
The only piece of information you can change from this screen is the Company Code. This code is only used within Revenue Manager, so you can make it something easy to use and remember.
Important: Make any changes with caution as it changes what appears in banking integrations.
Change Company Code
To change the company code for the management company:
-
Click Edit.
The Company Code screen displays
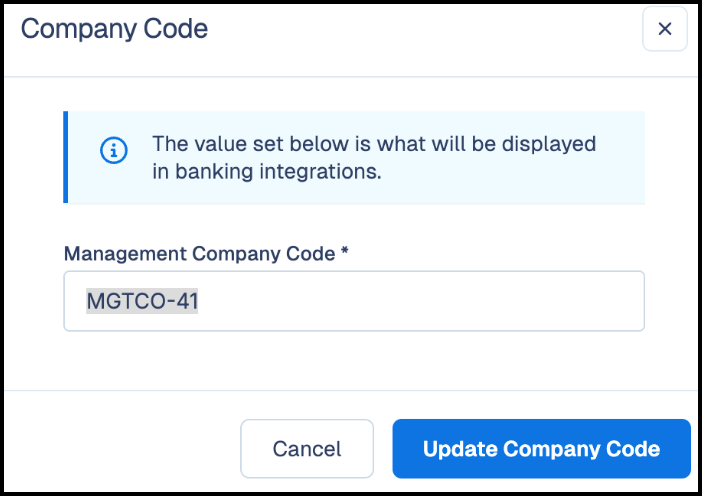
- Enter a new Management Company Code.
- Click Update Company Code.
Funds Page
Use this section of Revenue Manager to handle your management company's funds (also known as cost centers) which are a convenient way to organize financial information. Many associations have Operating and Reserve funds, but may include others, for example, Town Homes, Building 1, Building 2, etc.
If you do not use Funds, or no Fund is set, then the default Operating fund is used.
After you have a fund in Revenue Manager, the Funds page includes the following options:
-
New Fund: Add a new fund to your management Company. See the following Add New Fund procedure.
-
Set Order: Set the order that the funds will appear in reports. See the Set Order procedure.
-
Export: Export the entire table to an Excel file.
-
Report Description: Enter or update the name that shows for the Operating fund in reports.
-
Edit: Click to open the Edit Fund screen (similar to the Add New Fund screen) and change information about the fund.
-
Delete: Click to remove a fund. After you delete a fund you cannot retrieve it.
Add New Fund
To add a new fund for your association:
-
Navigate to Management > Revenue Manager.
-
Click the Configuration tab, and then Funds.
-
Click New Fund.
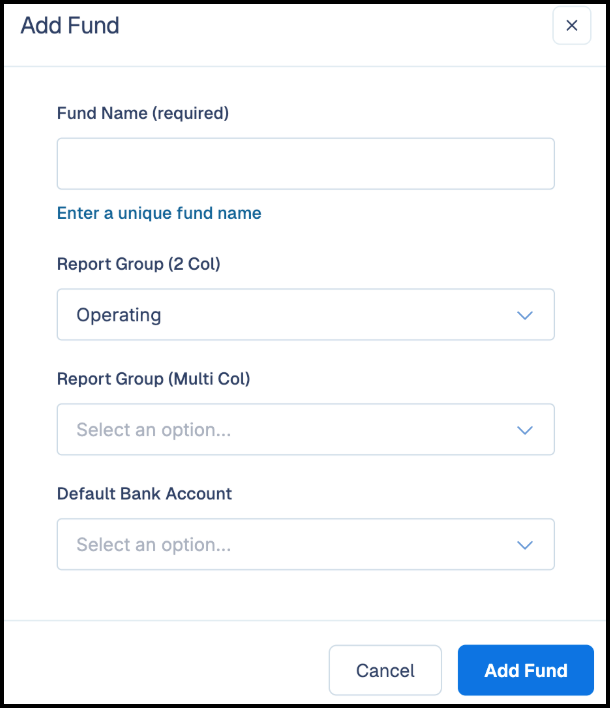
The Add Fund screen opens.
-
Provide the following information:
-
Fund Name: Enter the name of the fund. Ensure the name will help others understand
how the money is grouped.
- Report Group (2 Col): Select whether the fund is in the Operating or Reserve group.
-
Report Group (Multi Col): Select to group funds to show a grouped report versus a
fund report (typically pertains to balance sheets and income statements). This can help
associations with similar funds. For example, they could have an Operating group,
Reserve Group, and Clubhouse group, where the clubhouse group might consist of
a food and beverage fund, a repairs fund, and a party fund.
-
Default Bank Account: This account defaults to the Operating bank account. Select a
different account only if you want the fund to be paid out of a bank account other than
the Operating bank account. If you do not have a bank account set up, see
the "Bank Accounts" article.
- Click Add Fund.
Set Order
To set the fund order as you would like them to appear in a report:
-
Click Set Order.
The Set Fund Order screen opens.
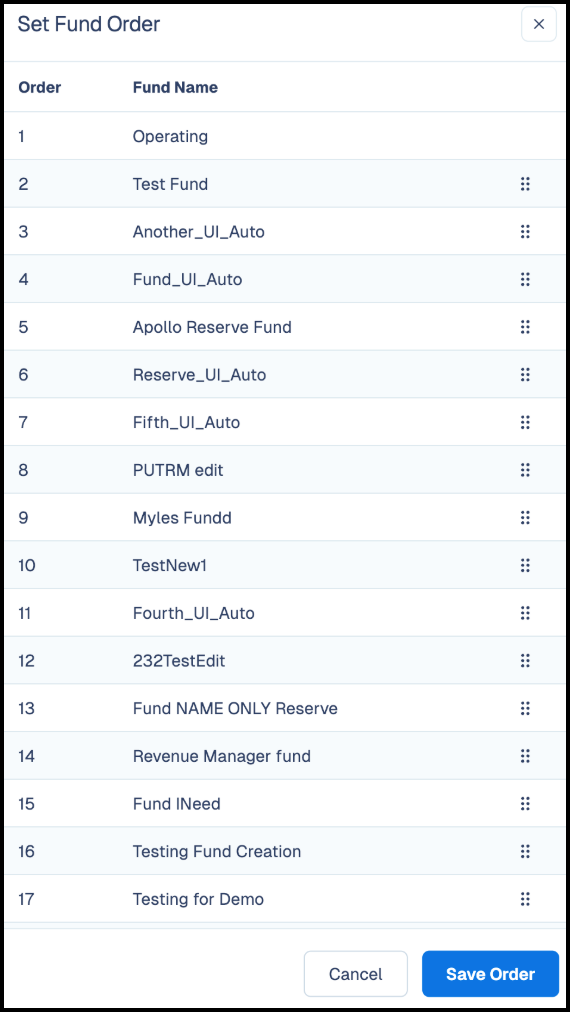
- Drag and drop the funds into the order that you want them displayed in a report.
- Click Save Order.
Back to Top
Charges Page
Use this area of Revenue manager to handle your management company's charges. Charges are any items that you charge for, including the management fee.
If you are new to Vantaca, you will not see any charges (unless they were set up during onboarding as assessments on the Model association, in which case you should check for accuracy). You must set up a charge for the management fee as well as any admin fees. These items should be outlined in your existing contracts.
If you used Management Center and have your charges set up in Vantaca, we will import them into Revenue Manager for you.
After you have a charge in Revenue Manager, the Charges page includes the following options:
-
New Charge: Add a new charge to your management company so you can charge associations for that fee. See the following Add New Charge procedure.
-
Export: Export the entire table to an Excel file.
-
Edit: Click to open the Edit Charge screen (similar to the Add New Charge screen) and change information about the fund.
-
Delete: Click to remove a charge. After you delete a charge you cannot retrieve it.
Add New Charge
To add a new charge:
-
Navigate to Management > Revenue Manager.
-
Click the Configuration tab, and then Charges.
-
Click Add Charge.
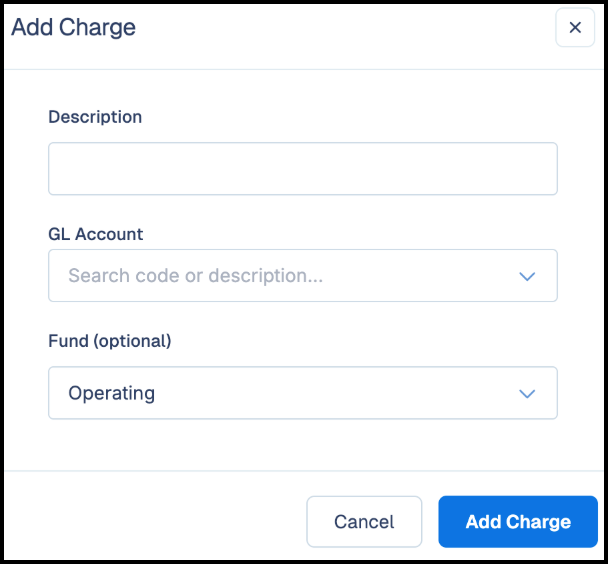
The Add Charge screen opens.
-
Provide the following information:
-
Description: Enter the name of the charge as it will appear on invoices. Remember
to use something descriptive and customer-friendly (for example, assessment,
special assessment, late fee, interest).
-
GL Account: Select the corporate income GL account to which charges and payments
in this charge grouping will be applied.
- Fund (optional): Select the fund into which this money will be deposited.
- Click Add Charge.

Comments
0 comments
Please sign in to leave a comment.